User Ideas / Prospects
.jpg)
Engineering plays a crucial role in the development of modern society. However, there's a growing disparity between the skills engineering graduates possess and the expertise required by engineering firms. This gap is a major concern for both academic institutions and industries. Engineering firms often struggle to find graduates who are "job-ready," while educational institutions are frequently criticized for not adequately preparing students for the practical demands of the field.
This article explores strategies to bridge this gap by aligning academic programs with industry needs, ensuring that students are equipped with the technical knowledge, practical skills, and professional mindset required in the engineering workforce.
1. Collaboration Between Industry and AcademiaOne of the most effective ways to align education with industry requirements is through direct collaboration between engineering firms and academic institutions. This partnership can take several forms:
- Industry Advisory Boards: Companies can participate in advisory boards for engineering schools to ensure curriculum development aligns with industry standards. They can provide feedback on emerging trends and technologies.
- Joint Research Initiatives: Academic research can become more relevant by involving industry partners in projects that solve real-world problems.
- Internships and Apprenticeships: Engineering firms can offer internship programs or apprenticeships that give students hands-on experience, allowing them to apply theoretical knowledge in real-world scenarios.
This partnership not only helps engineering programs stay relevant but also fosters innovation and provides students with practical insights.
2. Curriculum Modernization and FlexibilityTraditional engineering curricula often focus on theory, which, while essential, may lack the practical applications required by modern engineering firms. To address this, schools should consider:
- Updating Curriculum Content: Courses should cover the latest technologies and industry trends, such as automation, artificial intelligence, and sustainability in engineering.
- Incorporating Project-Based Learning: Schools should integrate more project-based learning (PBL), where students work on solving actual engineering challenges that they may face in their careers.
- Cross-Disciplinary Learning: Engineering is becoming increasingly interdisciplinary. A flexible curriculum that allows students to take courses in computer science, management, or business, for example, can broaden their skill set, making them more versatile in the job market.
While technical skills are crucial, engineers also need a broad range of soft skills to succeed in the workplace. Academic programs should, therefore, focus on:
- Problem-Solving and Critical Thinking: Encourage students to approach engineering challenges with innovative solutions and think critically about problems, not just follow established methods.
- Communication Skills: Engineers must be able to effectively communicate complex technical concepts to non-technical stakeholders, clients, or team members.
- Teamwork and Leadership: Many engineering projects require collaboration, often with diverse teams. Engineering schools can simulate this through group projects and leadership opportunities.
Additionally, integrating more hands-on experience through lab work, real-world problem-solving tasks, and industry-driven projects will help students build their practical knowledge.
4. Adopting Emerging Technologies and ToolsIn today's rapidly evolving landscape, technology is a key driver of change in engineering fields. Educational institutions must stay ahead by adopting and teaching students the tools that engineering firms are using. Key strategies include:
- Introducing Cutting-Edge Tools: Students should be familiar with the latest software and hardware used in their field. This might include computer-aided design (CAD), finite element analysis (FEA), or tools for machine learning and data analysis.
- Virtual and Augmented Reality in Training: Some universities are already adopting VR and AR to simulate engineering environments, allowing students to gain experience in a virtual space before entering the workforce.
- Exposure to Industry 4.0: The rise of Industry 4.0, marked by IoT, automation, and smart factories, demands that students understand how to work with interconnected systems and devices.
Mentorship programs can significantly bridge the knowledge and skills gap by connecting students with seasoned professionals. Mentorship provides guidance beyond the classroom, helping students understand the expectations of the industry and how to navigate their careers. Strategies to enhance mentorship include:
- Alumni Networks: Universities can leverage their alumni, who are often working professionals, to provide mentoring, guest lectures, or career advice to current students.
- Industry Mentors: Engineering firms can participate by providing mentors who can guide students through real-world engineering problems and professional development challenges.
- Soft Skill Workshops: Beyond mentorship, universities can offer workshops focused on professional development, such as resume building, job interviews, and networking.
Accreditation bodies such as ABET (Accreditation Board for Engineering and Technology) set standards that ensure engineering programs produce competent graduates. However, these standards must evolve as the industry changes. Engineering schools should work closely with these organizations to:
- Ensure Curriculum Relevance: Regular reviews of program outcomes and objectives will keep them aligned with industry demands.
- Promote Lifelong Learning: With the rapid advancement of technology, continuous education is necessary. Schools should offer professional development courses or certifications that help engineers update their skills throughout their careers.
Some engineering firms have begun offering their own training and certification programs, allowing students or new graduates to gain specific skills required for employment. Universities can collaborate with industry leaders to create:
- Certification Programs: These can be short-term courses or workshops focused on skills like coding, machine learning, or advanced manufacturing.
- Co-Developed Courses: Companies can co-develop curriculum content that reflects the skills they are actively seeking, ensuring that students graduate job-ready.
Establishing feedback loops between industry and academia ensures continuous improvement in the educational process. This can be done through:
- Graduate Surveys: Universities can track their graduates’ success in the job market and obtain feedback from employers to gauge the effectiveness of their programs.
- Employer Feedback: Engineering firms can offer direct feedback on the performance of recent graduates, highlighting areas of improvement for academic institutions.
- Regular Program Audits: Universities should regularly audit their engineering programs based on industry trends, feedback, and job market analysis, ensuring that the curriculum remains relevant.
The gap between what engineering firms need and what is taught in universities can be bridged through stronger collaboration, curriculum modernization, an emphasis on practical and soft skills, and the integration of emerging technologies. By adopting a more hands-on and flexible approach to education, and by continuously engaging with industry professionals, universities can better equip their students for the evolving demands of the engineering workforce.
Ultimately, the key is not just preparing students for their first job, but for lifelong careers that will require adaptability, critical thinking, and a broad set of skills. The future of engineering education lies in its ability to evolve alongside industry needs.

On the Role of Failure in Engineering:
"Failures appear to be inevitable in the wake of prolonged success, which encourages lower margins of safety. Failures, in turn, lead to greater safety margins and hence new periods of success."
— Henry Petroski, "To Engineer Is Human"On the Evolution and Future of Civil Engineering:
"The past achievements in civil engineering provide a solid foundation, but the future requires engineers to adapt, innovate, and apply systems thinking to solve the complex challenges of tomorrow."
— Samuel Labi, "Introduction to Civil Engineering Systems"On Experimentation in Civil Engineering:
"Civil engineers must not just follow the rules but innovate through experimentation to uncover new solutions to persistent challenges, ensuring that the designs of today inspire the achievements of tomorrow."
— Francis J. Hopcroft & Abigail J. Charest, "Experiment Design for Civil Engineering"On the Importance of Design and Adaptation:
"Design is getting from here to there—an essential process of revision, adaptation, and problem-solving that keeps civil engineering at the forefront of societal development."
— Henry Petroski, "To Engineer Is Human"On Engineering's Human Aspect:
"Engineering is not just about machines and structures; it is fundamentally about improving the human experience through thoughtful and sustainable design."
— Henry Petroski, "To Engineer Is Human"On Learning from Mistakes:
"Success is built on the ability to foresee and prevent failure. Every failure in design is a lesson that helps engineers push the boundaries of what’s possible."
— Henry Petroski, "To Engineer Is Human"On the Importance of Systems Thinking:
"Civil engineering systems must be developed with foresight, understanding that today’s solutions must be adaptable to the changing demands of tomorrow."
— Samuel Labi, "Introduction to Civil Engineering Systems"On the Balance of Innovation and Safety:
"Engineers walk the fine line between bold innovation and meticulous safety, ensuring that each new idea contributes to progress without compromising security."
— Michael R. Lindeburg, "Civil Engineering Reference Manual for the PE Exam"On Sustainable Materials:
"Sustainability in civil engineering materials is not just a trend; it's a responsibility to ensure that what we build today does not hinder the possibilities of tomorrow."
— Kathryn E. Schulte Grahame et al., "Essentials of Civil Engineering Materials"
These quotes emphasize the balance of creativity, safety, and continuous improvement in civil engineering, inspiring professionals to push boundaries while learning from both successes and failures.
Indian engineers, particularly those involved in manufacturing, construction, and industrial activities, must be aware of several laws and regulations . These laws ensure safety, environmental protection, and compliance with ethical standards. Below are some of the key laws that Indian engineers should be familiar with:
0. The Factories Act, 1948
This is a key piece of legislation in India designed to regulate labor conditions in factories and ensure the safety, health, and welfare of workers. It applies to factories employing 10 or more workers where power is used, or 20 or more workers where no power is used. The Act sets out provisions for working conditions, working hours, safety measures, and employee welfare, aiming to protect workers from industrial hazards, including exposure to carcinogenic materials and other health risks.
Key Provisions of the Factories Act, 1948: 1. Health Provisions:- Cleanliness: Factories must maintain cleanliness, including the disposal of waste and effluents.
- Ventilation and Temperature Control: Adequate ventilation and temperature control measures must be provided to ensure worker comfort and safety.
- Dust and Fumes Control: Factories are required to control harmful dust, fumes, and other emissions to prevent health risks to workers.
- Fencing of Machinery: All dangerous machinery must be fenced off to prevent accidental injuries.
- Precautions against Dangerous Substances: Special provisions are in place to safeguard workers from exposure to dangerous substances like chemicals and carcinogenic materials.
- Worker Training: Workers should be informed and trained about the risks involved in handling hazardous materials.
- Washing Facilities: Adequate facilities for washing must be provided for workers exposed to dangerous substances.
- First Aid: Every factory must have a first-aid facility with trained personnel.
- Canteens, Restrooms, and Crèches: Factories above a certain size must provide these welfare facilities for the employees.
- Working Hours: The Act prescribes a maximum of 48 hours per week, with daily shifts not exceeding 9 hours.
- Overtime: Workers are entitled to overtime wages if they work beyond the prescribed hours.
- Annual Leave: Workers are entitled to paid annual leave depending on their length of service.
- The Act emphasizes the protection of workers from hazardous processes. It includes provisions for safety equipment, medical supervision, and inspections to minimize exposure to harmful materials like asbestos, lead, and silica dust.
- Safety Officers: Factories employing over a certain number of workers must appoint safety officers to ensure compliance with safety regulations.
- Industries that involve hazardous processes, such as chemicals or those that generate carcinogenic materials, are subject to additional regulations under Section 41A to 41H of the Act.
- Medical Surveillance: Workers in hazardous industries must undergo periodic health checks to detect any signs of occupational diseases early.
- Child Labor: The Act prohibits the employment of children below the age of 14 in factories.
- Employment of Women: There are specific provisions for regulating the working hours of women and ensuring their safety.
- Purpose: This act provides a framework for the protection and improvement of the environment, and it regulates industrial activities that may harm the environment.
- Key Provisions:
- Regulates emissions and discharges of pollutants into the environment.
- Ensures environmental impact assessments (EIA) for projects that may cause ecological damage.
- Provides power to the government to shut down factories or impose fines for non-compliance with environmental standards.
- Relevance for Engineers: Engineers must design and operate projects in accordance with environmental standards and may need to obtain environmental clearances before starting major infrastructure or industrial projects.
- Purpose: This law focuses on controlling and reducing air pollution by regulating emissions from industrial and vehicular sources.
- Key Provisions:
- Mandates that industries obtain air pollution control consent from the State Pollution Control Boards (SPCBs).
- Prohibits the discharge of pollutants beyond prescribed limits.
- Requires pollution control equipment to be installed in factories emitting hazardous gases.
- Relevance for Engineers: Engineers, especially those in manufacturing and energy sectors, must ensure that their projects adhere to air quality norms and install emission control systems where necessary.
- Purpose: This act aims to prevent and control water pollution by regulating the discharge of industrial effluents into water bodies.
- Key Provisions:
- Industries are required to obtain permission from the SPCB before discharging effluents into water sources.
- Prohibits the disposal of toxic industrial waste into rivers and lakes without proper treatment.
- Provides penalties for non-compliance and pollution violations.
- Relevance for Engineers: Engineers involved in industries like chemicals, textiles, and food processing must ensure that their wastewater is treated to meet legal standards before disposal.
- Purpose: This act regulates the design, operation, and maintenance of boilers in industrial establishments to ensure their safe usage.
- Key Provisions:
- Engineers must get boilers inspected by certified inspectors before they can be used in factories.
- Ensures compliance with safety standards for the operation of boilers and penalties for unsafe practices.
- Relevance for Engineers: Mechanical and industrial engineers working with boilers need to be familiar with inspection, certification, and operational safety requirements.
- Purpose: The act promotes efficient use of energy and mandates energy-saving measures in industries.
- Key Provisions:
- Establishes the Bureau of Energy Efficiency (BEE) to enforce energy standards.
- Mandates energy audits for industries consuming large amounts of energy and encourages the adoption of energy-efficient technologies.
- Relevance for Engineers: Engineers working on energy projects or in energy-intensive industries must adopt energy-efficient practices and comply with energy conservation guidelines.
- Purpose: Provides for mandatory public liability insurance for industries that deal with hazardous substances, ensuring compensation for victims of accidents caused by industrial operations.
- Key Provisions:
- Requires industries to take out insurance policies covering potential harm caused by accidents involving hazardous substances.
- Ensures immediate relief to individuals affected by industrial accidents.
- Relevance for Engineers: Engineers working in industries involving hazardous chemicals or processes should be aware of liability concerns and ensure proper safety measures and insurance coverage.
- Purpose: Regulates the working conditions of laborers employed in construction projects and provides for their safety, health, and welfare.
- Key Provisions:
- Requires construction employers to register their projects with state governments.
- Ensures the safety of workers by providing provisions for protective gear, medical care, and sanitation facilities.
- Mandates welfare measures such as crèches, canteens, and first-aid facilities at construction sites.
- Relevance for Engineers: Civil and construction engineers need to ensure that their projects comply with this act to protect workers and ensure legal compliance.
- Purpose: Governs the generation, transmission, distribution, and use of electricity in India, ensuring the safety and reliability of electrical installations and networks.
- Key Provisions:
- Engineers must ensure that electrical installations conform to safety standards.
- The act also regulates power trading, renewable energy sources, and electricity tariffs.
- Relevance for Engineers: Electrical engineers need to design, implement, and manage power systems according to the safety and operational standards outlined in the act.
- Purpose: This regulation governs the generation, handling, storage, and disposal of hazardous waste, including carcinogenic substances.
- Key Provisions:
- Mandates proper waste management systems for industries generating hazardous waste.
- Ensures that industries follow strict procedures for the transportation and disposal of hazardous materials.
- Regulates the transboundary movement of hazardous waste.
- Relevance for Engineers: Engineers in sectors like chemicals, pharmaceuticals, and manufacturing must ensure the safe handling, storage, and disposal of hazardous waste, avoiding environmental contamination.
- Purpose: Regulates the working conditions, safety, and welfare of workers in mines.
- Key Provisions:
- Provides safety measures related to mine operations, including the use of machinery and explosives.
- Mandates medical examinations, protective equipment, and safe working conditions in mines.
- Relevance for Engineers: Mining engineers and those involved in extractive industries need to comply with these standards to prevent accidents and occupational health risks.
- Purpose: A comprehensive code providing guidelines for the construction, design, and maintenance of buildings in India, covering structural safety, fire safety, and sustainability.
- Key Provisions:
- Contains rules related to structural design, fire protection, electrical services, plumbing, and water supply.
- Mandates adherence to safety norms for earthquake resistance, fire prevention, and other natural disasters.
- Relevance for Engineers: Civil and structural engineers must ensure that their designs comply with the NBC to maintain the safety and stability of buildings.
For engineers in India, compliance with these laws is crucial not only to avoid legal penalties but also to ensure the safety and well-being of workers, the environment, and the public. Awareness and adherence to these laws help in maintaining ethical and sustainable engineering practices.
By following these regulations, engineers can contribute to safer working conditions, environmental protection, and the overall progress of industrial and infrastructural development in India.
The Factories Act, 1948 is a key piece of legislation in India designed to regulate labor conditions in factories and ensure the safety, health, and welfare of workers. It applies to factories employing 10 or more workers where power is used, or 20 or more workers where no power is used. The Act sets out provisions for working conditions, working hours, safety measures, and employee welfare, aiming to protect workers from industrial hazards, including exposure to carcinogenic materials and other health risks.
Key Provisions of the Factories Act, 1948:1. Health Provisions:- Cleanliness: Factories must maintain cleanliness, including the disposal of waste and effluents.
- Ventilation and Temperature Control: Adequate ventilation and temperature control measures must be provided to ensure worker comfort and safety.
- Dust and Fumes Control: Factories are required to control harmful dust, fumes, and other emissions to prevent health risks to workers.
- Fencing of Machinery: All dangerous machinery must be fenced off to prevent accidental injuries.
- Precautions against Dangerous Substances: Special provisions are in place to safeguard workers from exposure to dangerous substances like chemicals and carcinogenic materials.
- Worker Training: Workers should be informed and trained about the risks involved in handling hazardous materials.
- Washing Facilities: Adequate facilities for washing must be provided for workers exposed to dangerous substances.
- First Aid: Every factory must have a first-aid facility with trained personnel.
- Canteens, Restrooms, and Crèches: Factories above a certain size must provide these welfare facilities for the employees.
- Working Hours: The Act prescribes a maximum of 48 hours per week, with daily shifts not exceeding 9 hours.
- Overtime: Workers are entitled to overtime wages if they work beyond the prescribed hours.
- Annual Leave: Workers are entitled to paid annual leave depending on their length of service.
- The Act emphasizes the protection of workers from hazardous processes. It includes provisions for safety equipment, medical supervision, and inspections to minimize exposure to harmful materials like asbestos, lead, and silica dust.
- Safety Officers: Factories employing over a certain number of workers must appoint safety officers to ensure compliance with safety regulations.
- Industries that involve hazardous processes, such as chemicals or those that generate carcinogenic materials, are subject to additional regulations under Section 41A to 41H of the Act.
- Medical Surveillance: Workers in hazardous industries must undergo periodic health checks to detect any signs of occupational diseases early.
- Child Labor: The Act prohibits the employment of children below the age of 14 in factories.
- Employment of Women: There are specific provisions for regulating the working hours of women and ensuring their safety.
The Directorate of Industrial Safety and Health (DISH) in each state ensures compliance with the Factories Act. Inspections, licensing, and certifications are conducted to ensure that factories adhere to the safety, health, and welfare provisions.
Amendments:The Factories Act has been amended several times, with notable amendments to improve worker safety, especially regarding hazardous industries. Factories (Amendment) Bill 2016 introduced increased penalties for non-compliance and additional safeguards for workers in hazardous processes.
Relevance:The Factories Act, 1948 plays a crucial role in mitigating industrial hazards, including carcinogenic exposures, by enforcing stringent safety measures and health protocols in India’s manufacturing and engineering sectors.
An Act to consolidate and amend the law regulating labor in factories.
Be it enacted by Parliament as follows:
Chapter I: PreliminaryShort Title, Extent, and Commencement:
- This Act may be called the Factories Act, 1948.
- It extends to the whole of India.
- It shall come into force on such date as the Central Government may, by notification in the Official Gazette, appoint.
Definitions:
- Factory: A premises where 10 or more workers are working, and power is used, or 20 or more workers are working without the use of power.
- Worker: A person employed directly or through any agency, whether for wages or not, in any manufacturing process or any incidental process.
- Occupier: The person who has ultimate control over the affairs of the factory.
- Inspectors:
- The State Government shall appoint Inspectors for enforcing the provisions of the Act.
- Inspectors have the power to enter any factory and examine any machinery or documents.
Cleanliness:
- Every factory shall be kept clean, including provisions for sweeping, washing, and removing waste.
Disposal of Wastes and Effluents:
- Effective arrangements shall be made for the treatment of wastes and effluents.
Ventilation and Temperature:
- Adequate ventilation and cooling provisions must be in place to ensure the comfort of the workers.
Dust and Fume Control:
- Effective measures shall be taken to prevent the inhalation of dust, fumes, or other impurities generated in the manufacturing process.
Lighting:
- Sufficient and suitable lighting must be provided in every part of the factory.
Overcrowding:
- Factories must ensure that workers are not overcrowded to a degree that is injurious to their health.
Fencing of Machinery:
- Every dangerous part of any machinery shall be securely fenced to prevent injury.
Work on or Near Machinery in Motion:
- Special care and supervision are required when workers are engaged with machinery in motion.
Employment of Young Persons on Dangerous Machines:
- No young person (below 18 years) shall work on dangerous machines unless they have been trained and are under supervision.
Prohibition of Work on Certain Dangerous Machines:
- Specific machines may be prohibited by the government from use without adequate safeguards.
Precautions Against Dangerous Fumes, Gases, etc.:
- Suitable measures must be adopted to prevent the build-up of dangerous fumes or gases.
Protection of Eyes:
- Goggles or other protective equipment shall be provided where processes involve risk of injury to the eyes.
Precautions in Case of Fire:
- Factories must be equipped with adequate means of escape and firefighting equipment in case of fire.
Washing Facilities:
- Adequate and suitable washing facilities must be provided for workers.
Facilities for Storing and Drying Clothing:
- Provision for drying and storing wet clothing should be made where necessary.
Facilities for Sitting:
- Workers whose work is performed standing should be provided with seats for rest.
First Aid Appliances:
- Every factory must have a first aid box equipped with prescribed contents and a trained person in charge.
Canteens:
- Canteens must be provided in factories where more than 250 workers are employed.
Shelters, Restrooms, and Lunch Rooms:
- Suitable shelters or restrooms and lunch rooms shall be provided for workers.
Creches:
- Factories with more than 30 women workers must provide a creche for the use of children of such workers.
Weekly Hours:
- No adult worker shall be required or allowed to work in a factory for more than 48 hours a week.
Daily Hours:
- No adult worker shall work more than 9 hours in any day.
Intervals for Rest:
- A rest interval of at least half an hour shall be provided after five hours of continuous work.
Overtime:
- Workers are entitled to overtime pay at twice the normal rate for hours worked in excess of the prescribed limits.
Prohibition of Employment of Children:
- No child under 14 years of age shall be employed in any factory.
Working Hours for Adolescents:
- Adolescents (ages 15-18) may work in factories only with the necessary certification and are limited to specific working hours.
- Annual Leave:
- Workers are entitled to annual leave with wages at a rate of one day for every 20 days worked in the case of adults and one day for every 15 days worked in the case of children.
Special Provisions Relating to Hazardous Processes:
- Factories involving hazardous processes must ensure the health and safety of workers by implementing medical surveillance, safety audits, and appropriate safety measures as prescribed.
Notice of Certain Accidents:
- The occupier of a factory must inform the prescribed authorities about any accident that causes serious bodily injury or death.
- Penalties for Offenses:
- Violation of the provisions of this Act may result in penalties, including fines and imprisonment, depending on the severity of the offense.
- Power to Make Rules:
- The State Governments may make rules to carry out the provisions of this Act.
This is a summarized version of the Factories Act, 1948. For the full text and specific legal language, it is recommended to refer to legal documents or the Official Gazette of India.
In India, the regulation of carcinogenic materials is overseen by several national agencies and laws, aimed at protecting public health and the environment. India has taken steps to control the use of certain carcinogenic substances, although enforcement and awareness can vary across sectors. Below is an overview of the governing bodies, bans, and regulations related to carcinogenic materials in India.
1. Asbestos- Status in India:
- Asbestos is not fully banned in India. The use of chrysotile (white asbestos) is still permitted and widely used in industries such as construction (roofing sheets), despite global recognition of its severe health risks.
- However, blue and brown asbestos (the more dangerous forms) have been banned.
- Governing Bodies:
- Ministry of Environment, Forest and Climate Change (MoEFCC): Regulates asbestos-related industries under environmental laws.
- Directorate General of Mines Safety (DGMS): Oversees the safety of workers exposed to asbestos, particularly in mining and processing industries.
- Factories Act (1948): Includes asbestos on the list of substances that require safety measures in factories.
- Status in India:
- The use of hexavalent chromium is restricted, particularly in leather tanneries and electroplating industries. Chromium VI is subject to environmental regulations and worker safety guidelines.
- Governing Bodies:
- Central Pollution Control Board (CPCB): Regulates chromium discharge and air emissions, particularly from industries like leather tanning and electroplating.
- Bureau of Indian Standards (BIS): Sets permissible limits for hexavalent chromium in products.
- Factories Act: Enforces exposure limits and safety measures for workers handling chromium.
- Status in India:
- Benzene is regulated due to its carcinogenic nature, with limits placed on its use in industrial processes and consumer products.
- Governing Bodies:
- CPCB: Sets limits on benzene emissions, particularly in industries such as oil refineries, petrochemicals, and paints.
- Petroleum and Natural Gas Regulatory Board (PNGRB): Regulates benzene content in fuels.
- Indian Ministry of Labour: Benzene exposure in the workplace is regulated under the Factories Act, which mandates limits on permissible exposure levels.
- Status in India:
- Formaldehyde is widely used in India in industries such as textiles, furniture, and construction. However, its use is regulated, particularly in formaldehyde-emitting products like particleboard and plywood.
- Governing Bodies:
- BIS: Sets standards for formaldehyde emissions in consumer products such as wood panels.
- Ministry of Environment, Forest and Climate Change (MoEFCC): Regulates environmental exposure and emissions of formaldehyde.
- Status in India:
- PVC is widely used in construction (pipes, flooring), packaging, and other industries. However, the production and disposal of PVC, which releases carcinogenic dioxins, are monitored by the government.
- Governing Bodies:
- CPCB: Regulates PVC waste management and disposal to limit environmental pollution.
- BIS: Establishes standards for the safe production and use of PVC products.
- Status in India:
- Crystalline silica exposure is prevalent in industries like construction, mining, and stone-cutting. Regulations exist for controlling workplace exposure.
- Governing Bodies:
- DGMS: Monitors safety standards in mining and construction to reduce silica dust exposure.
- Factories Act: Mandates safety protocols for industries where workers are exposed to crystalline silica.
- Status in India:
- Cadmium is restricted, particularly in industries like battery manufacturing, electronics, and metal plating. Regulations focus on reducing cadmium emissions and exposure.
- Governing Bodies:
- CPCB: Enforces limits on cadmium waste and emissions, particularly from industries.
- MoEFCC: Regulates environmental exposure to cadmium through hazardous waste management rules.
- Status in India:
- India has taken significant steps to regulate lead use, particularly in paints, batteries, and pipes. Lead was banned from gasoline in the 2000s, and lead content in paints and children’s products is now regulated.
- Governing Bodies:
- CPCB: Manages lead emissions and waste, particularly in the paint, battery, and construction industries.
- BIS: Sets standards for lead levels in consumer products, such as paints and toys.
- Ministry of Health and Family Welfare: Oversees lead regulations in consumer products like cosmetics.
Central Pollution Control Board (CPCB):
- Under the Ministry of Environment, Forest and Climate Change (MoEFCC), the CPCB sets pollution control norms and manages hazardous waste. It enforces restrictions on carcinogenic materials such as asbestos, chromium, and benzene in industries.
Directorate General of Mines Safety (DGMS):
- A government agency responsible for safety in mining and quarrying industries, focusing on minimizing exposure to harmful substances like asbestos and silica dust.
Bureau of Indian Standards (BIS):
- The BIS sets product safety standards for consumer goods, including limits on harmful chemicals like lead, formaldehyde, and cadmium in products like paints, toys, and electronics.
Factories Act, 1948:
- This key legislation regulates the health and safety of workers in India’s industrial sectors. It includes provisions for protecting workers from carcinogens such as asbestos, benzene, and chromium VI by setting exposure limits and enforcing safety measures.
Environmental Protection Act, 1986:
- Provides the framework for the protection and improvement of the environment, including the regulation of hazardous substances and carcinogens. It enables the government to ban or restrict dangerous chemicals and materials.
Hazardous and Other Wastes (Management and Transboundary Movement) Rules, 2016:
- This regulation governs the management, disposal, and transboundary movement of hazardous waste, including carcinogenic materials like asbestos and cadmium.
- Enforcement Issues: While regulations exist, enforcement can be uneven across sectors, particularly in informal industries like construction and small-scale manufacturing, where worker safety practices are less stringent.
- Public Awareness: Awareness about the health risks of carcinogens is growing, but there is still a significant gap in understanding the long-term effects, particularly in rural and less-developed regions.
India has implemented numerous regulations to control the use and exposure to carcinogenic materials, but enforcement and compliance are often inconsistent. Key governing bodies like the CPCB, BIS, and DGMS are working to reduce exposure to harmful substances, but greater enforcement and public awareness efforts are needed to reduce the risks effectively.
.jpeg)
- Bans/Restrictions:
- Many countries, including the European Union, Australia, and Canada, have issued complete bans on asbestos due to its severe health risks.
- In the United States, asbestos is not fully banned but is highly regulated by the Environmental Protection Agency (EPA) and Occupational Safety and Health Administration (OSHA).
- Governing Bodies:
- EPA (Environmental Protection Agency): Oversees asbestos use in the U.S.
- OSHA (Occupational Safety and Health Administration): Regulates workplace exposure in the U.S.
- European Chemicals Agency (ECHA): Under REACH regulations, the EU prohibits asbestos.
- World Health Organization (WHO): Advocates for a global ban on asbestos.
- Bans/Restrictions:
- The EU's REACH (Registration, Evaluation, Authorization, and Restriction of Chemicals) legislation heavily restricts the use of hexavalent chromium in many industries.
- In the U.S., the EPA and OSHA have strict exposure limits for workers, particularly in industries such as welding and chrome plating.
- Governing Bodies:
- EPA: Regulates chromium emissions and waste.
- OSHA: Sets exposure limits for workers in the U.S.
- ECHA: Manages restrictions within the EU.
- Bans/Restrictions:
- Benzene is highly regulated in many countries, with severe restrictions on its use in consumer products and industrial applications.
- The Clean Air Act in the U.S. limits benzene emissions, and OSHA regulates workplace exposure.
- The EU has placed strict limits on benzene concentration in consumer products.
- Governing Bodies:
- EPA: Regulates benzene emissions in the U.S.
- OSHA: Monitors occupational exposure.
- ECHA (EU): Limits the use of benzene in products.
- Bans/Restrictions:
- Formaldehyde is subject to strict regulations in many countries. The EU has banned or limited formaldehyde in textiles and building materials under REACH regulations.
- In the U.S., the Formaldehyde Emission Standards for Composite Wood Products Act restricts the emission of formaldehyde in wood products.
- Governing Bodies:
- EPA: Manages formaldehyde emissions and exposure in the U.S.
- OSHA: Regulates formaldehyde in the workplace.
- ECHA: Imposes restrictions on formaldehyde use in Europe.
- Bans/Restrictions:
- PVC itself has not been fully banned, but its production and disposal are heavily regulated due to the release of dioxins, which are carcinogenic.
- The EU’s REACH program and the EPA in the U.S. impose limits on the amount of hazardous chemicals, like phthalates, that can be used in PVC products.
- Governing Bodies:
- EPA: Regulates emissions and waste from PVC production.
- ECHA: Regulates hazardous additives in PVC products.
- Bans/Restrictions:
- Crystalline silica is not banned, but its use is heavily regulated due to its cancer-causing potential, especially in construction and manufacturing.
- OSHA implemented a rule in 2016 to limit workers' exposure to respirable crystalline silica.
- The EU has also imposed strict occupational exposure limits for silica dust.
- Governing Bodies:
- OSHA: Sets workplace exposure limits in the U.S.
- ECHA: Oversees silica use in the EU under worker safety regulations.
- Bans/Restrictions:
- Cadmium use has been significantly restricted in many industries. In the EU, cadmium is banned in most consumer products, including jewelry and electronics, under REACH.
- In the U.S., cadmium exposure is regulated by OSHA and environmental disposal is managed by the EPA.
- Governing Bodies:
- ECHA: Enforces restrictions on cadmium in products.
- EPA: Regulates cadmium emissions and waste disposal in the U.S.
- OSHA: Controls workplace exposure.
- Bans/Restrictions:
- Lead has been banned from paints, gasoline, and most plumbing systems in many countries, including the U.S. and the EU.
- The EU has imposed strict limits on lead in consumer products, and REACH includes comprehensive lead restrictions.
- The EPA in the U.S. restricts lead in drinking water systems and consumer products.
- Governing Bodies:
- EPA: Manages lead regulations for water systems, waste, and consumer products.
- OSHA: Regulates lead exposure in workplaces.
- ECHA: Imposes restrictions on lead in consumer products.
Environmental Protection Agency (EPA) (U.S.):
- Regulates environmental exposure to carcinogenic substances, setting emission limits and managing hazardous materials in industries.
Occupational Safety and Health Administration (OSHA) (U.S.):
- Focuses on workplace safety and health, including setting exposure limits for harmful substances like asbestos, chromium VI, silica, and benzene.
European Chemicals Agency (ECHA) (EU):
- Oversees chemical safety in the EU through the REACH program, which restricts the use of many harmful chemicals and materials in industries and consumer products.
International Agency for Research on Cancer (IARC) (Global):
- Part of the World Health Organization (WHO), the IARC classifies and provides guidelines on the carcinogenic risks of different materials.
National Institute for Occupational Safety and Health (NIOSH) (U.S.):
- Conducts research on workplace hazards, including carcinogens, and advises on safe exposure levels.
World Health Organization (WHO):
- Advocates for global health policies, including promoting the ban of asbestos and reducing exposure to carcinogens worldwide.
These regulatory bodies and bans have been essential in minimizing exposure to carcinogenic materials, aiming to reduce occupational and environmental cancer risks.
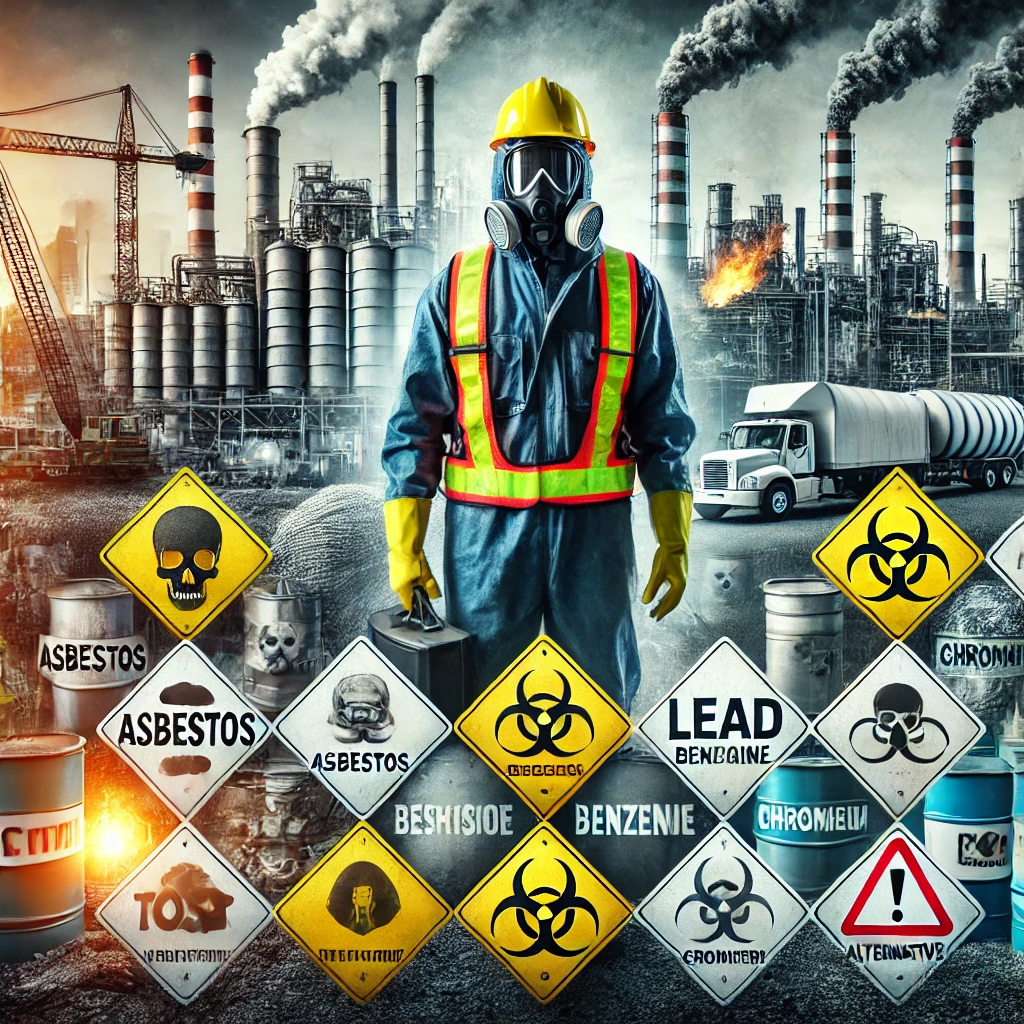
list of carcinogenic materials that have been widely used in various engineering fields, along with suggested safer alternatives aimed at reducing cancer rates.
1. Asbestos- Use: Once commonly used for insulation, fireproofing, and as a building material due to its resistance to heat and chemicals.
- Health Risks: Inhalation of asbestos fibers can cause mesothelioma, lung cancer, and asbestosis.
- Alternatives:
- Fiberglass insulation: A safe, non-carcinogenic alternative for insulation.
- Mineral wool: Another non-carcinogenic, heat-resistant material.
- Cellulose fibers: Made from recycled paper, it is eco-friendly and safe.
- Use: Applied in electroplating, stainless steel production, and pigments for paints and dyes.
- Health Risks: Known to cause lung cancer and other respiratory problems upon exposure.
- Alternatives:
- Trivalent chromium (Chromium III): Much safer and widely used in stainless steel manufacturing.
- Zinc-Nickel coating: Often used as an alternative for corrosion protection.
- Non-chromium-based paints: Safer and more environmentally friendly pigments.
- Use: Utilized in the production of plastics, rubbers, resins, and as an industrial solvent.
- Health Risks: Long-term exposure is linked to leukemia and other cancers.
- Alternatives:
- Toluene and Xylene: Less toxic than benzene, these solvents are safer for industrial uses.
- Water-based solvents: Widely used as a non-carcinogenic alternative in industrial processes.
- Use: Used as a preservative, adhesive in particleboard and plywood, and in many other engineering and building materials.
- Health Risks: Prolonged exposure can cause nasal and throat cancers.
- Alternatives:
- Formaldehyde-free resins: Used in manufacturing particleboard and plywood.
- Natural wood and adhesives: Sustainable and chemical-free alternatives.
- Low-VOC (volatile organic compound) materials: Improve air quality and reduce cancer risks.
- Use: Commonly used in piping, cables, and flooring.
- Health Risks: Dioxins released during the production and disposal of PVC have been linked to cancer.
- Alternatives:
- Cross-linked Polyethylene (PEX): A safer material for piping applications.
- High-density polyethylene (HDPE): Used as an alternative in construction and piping.
- Natural rubber and linoleum: Alternatives for flooring and other applications.
- Use: Widely used in construction materials like concrete, mortar, and sandblasting.
- Health Risks: Inhalation of fine silica dust is known to cause lung cancer, silicosis, and other respiratory diseases.
- Alternatives:
- Amorphous silica: Considered a safer form that doesn’t carry the same cancer risks.
- Substitute abrasive materials: Corn cobs, walnut shells, or steel grit for sandblasting.
- Prefabricated materials: Reduces on-site cutting and drilling, limiting silica exposure.
- Use: Commonly found in batteries, pigments, and as a coating for corrosion-resistant materials.
- Health Risks: Cadmium exposure is linked to lung and prostate cancers.
- Alternatives:
- Nickel-metal hydride (NiMH) batteries: A non-toxic alternative to cadmium-based batteries.
- Water-based pigments: Non-toxic substitutes for paints and coatings.
- Stainless steel: For corrosion resistance without the use of cadmium.
- Use: Historically used in paints, pipes, and batteries.
- Health Risks: Lead exposure can lead to several health problems, including brain cancer.
- Alternatives:
- Copper or PEX pipes: Used as a safer alternative to lead in plumbing.
- Lead-free paints: Modern paints are now made without lead additives.
- Lithium-ion batteries: A safer replacement for lead-acid batteries.
- Use of Non-Toxic, Recycled, and Eco-friendly Materials: Adopting materials that minimize environmental and human health impact.
- Improved Ventilation and Air Filtration Systems: To reduce exposure to airborne toxins during manufacturing and construction processes.
- Personal Protective Equipment (PPE): Proper use of protective gear in industries where exposure to harmful materials is unavoidable.
- Green Building Standards (e.g., LEED): Promoting construction practices that reduce the use of carcinogenic substances.
By adopting these safer alternatives, industries can significantly reduce exposure to carcinogenic materials, thus lowering cancer rates associated with occupational hazards.
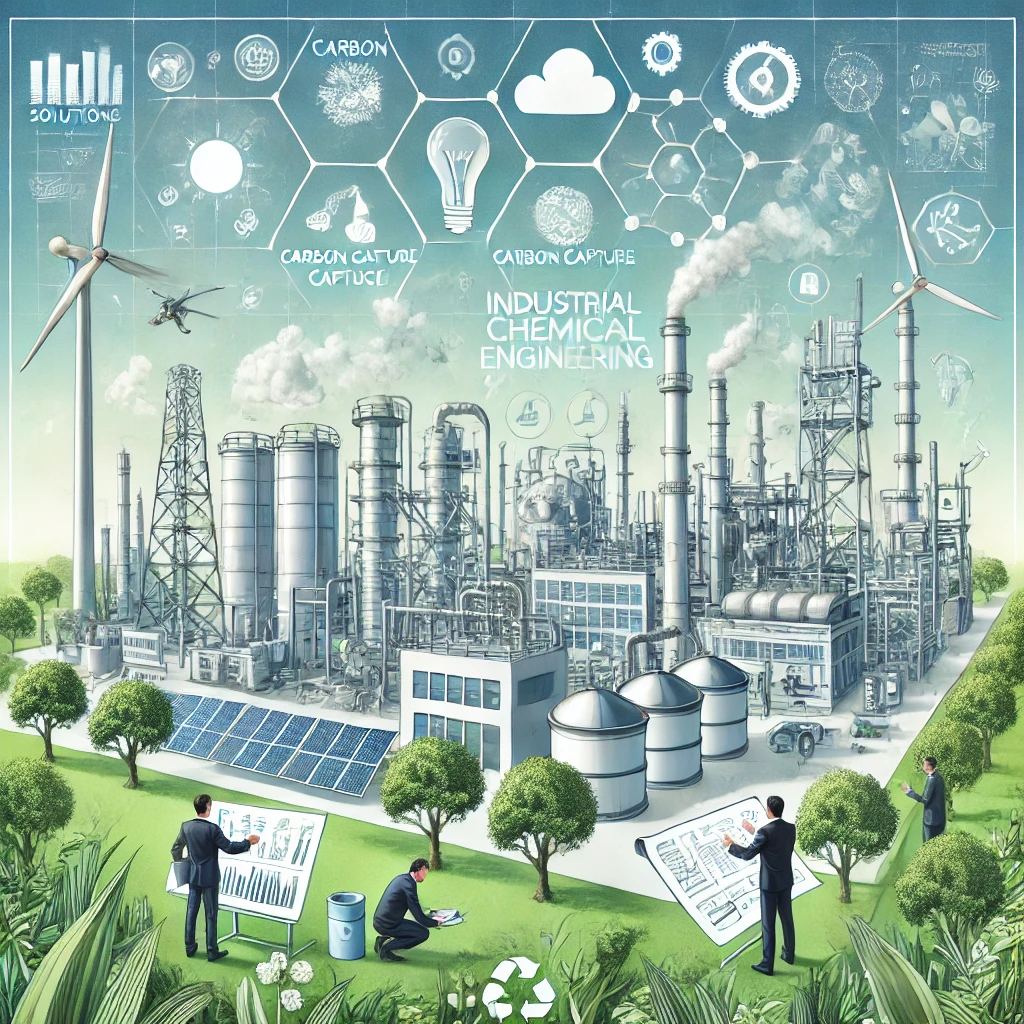
The Importance of Sustainability in Chemical Engineering: Addressing Environmental Challenges Through Innovation
Chemical engineering has been instrumental in transforming natural resources into useful products that enhance our quality of life. From petrochemicals to pharmaceuticals, fertilizers to fuels, the contributions of chemical engineers are vast. However, much like mechanical engineering, chemical engineering has also played a significant role in the environmental challenges we face today. Industrial processes powered by chemical engineering have led to significant pollution, resource depletion, and harmful waste production, contributing to the broader sustainability crisis. Now, chemical engineers are tasked with leading the transition to a more sustainable and environmentally responsible future.
Sustainability in chemical engineering is about balancing the need for innovation and production with the necessity of protecting the planet and conserving its resources for future generations. This approach requires a fundamental shift in how chemical engineers design processes, select materials, and manage waste. In the face of global climate change, pollution, and resource depletion, chemical engineers have the opportunity to be key drivers of sustainability, creating technologies and processes that reduce environmental impact while continuing to meet societal needs.
How Chemical Engineering-Based Industrialization Contributed to the Sustainability CrisisThe rise of industrial chemistry over the past century has delivered significant benefits to society, but it has also been a major driver of environmental degradation. Key factors contributing to the sustainability crisis include:
Petrochemical Dependence and Fossil Fuels: The chemical engineering industry is heavily reliant on fossil fuels, both as a primary energy source and as raw materials for producing chemicals, plastics, and fuels. The extraction and burning of fossil fuels release large quantities of greenhouse gases (GHGs) into the atmosphere, contributing to global warming. Furthermore, petroleum-based products like plastics are non-biodegradable, leading to significant waste accumulation in landfills and oceans.
Toxic Emissions and Pollution: Many chemical processes involve the use of hazardous materials that, when not properly managed, can result in air, water, and soil pollution. Industrial plants release harmful chemicals, including volatile organic compounds (VOCs) and sulfur dioxide (SO₂), into the environment, which can cause respiratory problems in humans and harm ecosystems. Improper handling of waste by-products also contributes to environmental degradation, such as chemical runoff that pollutes water bodies and disrupts aquatic ecosystems.
Intensive Resource Consumption: Chemical engineering processes often require vast amounts of water, energy, and raw materials. For example, the production of fertilizers and chemicals involves energy-intensive processes that contribute to the depletion of natural resources. Similarly, the mining of raw materials for chemical production can lead to habitat destruction, biodiversity loss, and unsustainable resource extraction.
Waste Generation: Many traditional chemical processes are inefficient, producing significant amounts of waste and by-products. Industrial plants produce hazardous waste, including toxic chemicals and heavy metals, which can contaminate ecosystems if not properly disposed of. Plastics, a major product of the chemical industry, are another significant source of pollution, with millions of tons of plastic waste entering oceans every year.
To mitigate the environmental impact of the chemical industry, chemical engineers must shift towards more sustainable practices. This includes developing green technologies, adopting renewable energy sources, and minimizing waste. Sustainable chemical engineering involves designing processes that reduce environmental harm, conserve resources, and contribute to a more circular economy. Here are several key strategies for achieving sustainability in chemical engineering:
Green Chemistry and Process Design: Green chemistry focuses on designing chemical processes that minimize the use of hazardous substances and reduce the production of harmful by-products. Chemical engineers can develop processes that use non-toxic, renewable raw materials, such as biomass, instead of fossil fuels. Green chemistry also promotes energy-efficient processes, reducing the overall energy consumption of chemical plants.
One important aspect of sustainable chemical process design is catalysis. Catalysts enable chemical reactions to occur more efficiently, often at lower temperatures and pressures, which reduces energy consumption and emissions. By developing new, highly efficient catalysts, chemical engineers can help industries minimize their environmental footprint while maintaining high levels of production.
Renewable Energy Integration: To reduce the carbon footprint of chemical processes, chemical engineers must integrate renewable energy sources into their operations. Solar, wind, and biomass energy can be used to power chemical plants, reducing the industry’s dependence on fossil fuels. Engineers can also explore innovative methods such as using renewable electricity in electrochemical processes, which could significantly reduce emissions compared to traditional combustion-based methods.
For example, renewable energy-powered electrolysis can be used to produce hydrogen—a clean fuel that emits only water when burned. By developing hydrogen-based processes and promoting the use of hydrogen as an energy carrier, chemical engineers can help decarbonize industries that are traditionally reliant on fossil fuels.
Waste Minimization and Circular Economy: Traditional chemical processes often result in large amounts of waste, much of which is hazardous or difficult to dispose of. Sustainable chemical engineering emphasizes waste minimization and the recovery of valuable materials from waste streams. Chemical engineers can design processes that recycle by-products and convert waste into useful materials, thus creating a closed-loop system where waste is reduced or eliminated.
For example, chemical recycling technologies, which break down plastics into their chemical building blocks, can help address the growing problem of plastic waste. Engineers are also working on developing biodegradable plastics made from renewable resources, which could reduce the long-term environmental impact of plastic waste.
Carbon Capture and Utilization: Given the large quantities of carbon dioxide (CO₂) emitted by the chemical industry, carbon capture and utilization (CCU) technologies are crucial for reducing the industry’s carbon footprint. Chemical engineers are developing methods to capture CO₂ from industrial processes and repurpose it as a feedstock for producing chemicals, fuels, and materials. This approach not only reduces CO₂ emissions but also creates value from what was previously considered waste.
For instance, captured CO₂ can be used to produce synthetic fuels, which can replace traditional fossil fuels. Additionally, engineers are exploring the use of CO₂ as a raw material in the production of plastics, cement, and other building materials, thereby sequestering carbon in long-lasting products.
Sustainable Water and Resource Management: Chemical engineering processes are often water-intensive, contributing to water scarcity in many regions. Engineers can adopt practices that minimize water usage and promote water recycling in chemical plants. By implementing advanced filtration and purification technologies, chemical engineers can ensure that water used in industrial processes is treated and reused, reducing the overall demand for freshwater resources.
Additionally, engineers can promote the use of alternative, sustainable raw materials, such as plant-based feedstocks, to replace non-renewable resources like petroleum. The use of bio-based materials reduces reliance on finite resources and promotes a more sustainable supply chain.
Biotechnology and Bioengineering: Biotechnology offers promising solutions for sustainability in chemical engineering. By harnessing the power of living organisms—such as bacteria, yeast, and algae—chemical engineers can develop bio-based processes that produce chemicals, fuels, and materials with lower environmental impact. For example, bioengineering can be used to produce biofuels from agricultural waste, reducing the need for fossil fuels and lowering carbon emissions.
Bio-based chemicals and materials are often biodegradable, meaning they break down naturally in the environment and pose less of a threat to ecosystems. Engineers are also exploring the use of microbial systems to capture carbon and produce valuable chemicals, further contributing to the circular economy.
To address the sustainability crisis, chemical engineers must adopt practices that prioritize environmental responsibility and resource conservation. Key practices include:
- Green Process Engineering: Chemical engineers should design processes that minimize the use of hazardous chemicals, reduce waste, and improve energy efficiency.
- Lifecycle Assessments (LCA): Engineers must evaluate the environmental impact of chemical products and processes throughout their entire lifecycle, from raw material extraction to disposal.
- Eco-Friendly Material Substitution: Substituting toxic or non-renewable materials with renewable or biodegradable alternatives can reduce environmental harm and improve sustainability.
- Carbon Neutral Processes: Developing carbon-neutral or carbon-negative chemical processes, such as those powered by renewable energy, helps reduce the industry's overall carbon footprint.
- Cross-Disciplinary Collaboration: Chemical engineers can work with environmental scientists, policy makers, and other engineers to create comprehensive, sustainable solutions for industrial processes.
Chemical engineering has been both a driver of industrial progress and a contributor to environmental challenges. However, it also holds the potential to be a key solution to the sustainability crisis. By embracing green chemistry, renewable energy, waste minimization, and biotechnology, chemical engineers can lead the transition toward more sustainable industrial practices. These innovations will help reduce pollution, conserve natural resources, and mitigate the effects of climate change, ensuring that chemical engineering contributes to a healthier, more sustainable planet for future generations.
Sustainability in chemical engineering is not just a technical challenge—it is an ethical responsibility. As stewards of the chemical processes that shape our world, chemical engineers must prioritize the long-term health of the planet over short-term gains, creating solutions that benefit both industry and the environment. By integrating sustainability into every aspect of their work, chemical engineers can ensure that their innovations contribute to a greener, more equitable future for all.

Mechanical engineering has long been at the heart of industrialization, driving innovations that have transformed society and elevated standards of living worldwide. From the development of steam engines and industrial machinery to modern transportation systems and manufacturing processes, mechanical engineering has significantly contributed to economic growth and technological progress. However, the rapid pace of industrialization, which largely depended on mechanical engineering advancements, has also played a significant role in creating today’s environmental crisis.
The challenges of climate change, resource depletion, pollution, and loss of biodiversity are direct consequences of industrial practices that have prioritized profit and efficiency over sustainability. Mechanical engineers now face the urgent task of addressing these environmental problems while continuing to innovate. It is essential that they incorporate sustainable practices to mitigate the harmful effects of past industrial advancements. In this context, mechanical engineers are uniquely positioned to be key players in resolving the sustainability crisis.
How Mechanical Engineering-Based Industrialization Led to the Sustainability CrisisThe industrial revolution, powered by mechanical engineering innovations, dramatically increased human productivity and economic output. However, it also initiated a range of unsustainable practices that have had lasting consequences for the environment:
Fossil Fuel Dependence: The advent of steam engines and internal combustion engines revolutionized transportation and manufacturing, but they also entrenched society's reliance on fossil fuels like coal, oil, and natural gas. The burning of these fuels releases large quantities of carbon dioxide (CO₂) and other greenhouse gases (GHGs) into the atmosphere, leading to global warming and climate change. Mechanical engineering advancements in industrial machinery and vehicles, while highly efficient, have exacerbated this issue by increasing fossil fuel consumption.
Mass Production and Resource Depletion: Mechanical engineering innovations led to the creation of factories and mass production systems, enabling industries to produce goods on a large scale. However, this surge in production also meant increased consumption of raw materials such as metals, minerals, and fossil fuels. The extraction and processing of these materials are resource-intensive, leading to habitat destruction, biodiversity loss, and depletion of finite natural resources.
Pollution and Waste: Mechanical engineering advancements in manufacturing and industrial processes often led to the uncontrolled release of pollutants into the air, water, and soil. Factories and power plants emit toxic chemicals and particulate matter, contributing to air and water pollution, which harms both ecosystems and human health. Moreover, the rise of mass production has led to an increase in waste generation, much of which ends up in landfills or oceans, causing further environmental degradation.
Industrial Agriculture and Mechanized Farming: The development of agricultural machinery such as tractors, harvesters, and irrigation systems revolutionized food production. While these innovations increased agricultural yields, they also contributed to environmental problems like soil erosion, water depletion, and the overuse of synthetic fertilizers and pesticides. These chemicals often leach into water bodies, causing harm to aquatic life and polluting freshwater supplies.
The environmental crisis precipitated by industrialization calls for a new approach to mechanical engineering—one that prioritizes sustainability, resource efficiency, and the reduction of environmental impact. Several practices can help resolve the issues created by past engineering-based industrialization:
Shifting to Renewable Energy: One of the most effective ways to address the fossil fuel problem is by transitioning to renewable energy sources. Mechanical engineers are at the forefront of developing renewable energy technologies such as wind turbines, solar panels, and hydropower systems. By focusing on energy efficiency and optimizing the design of these systems, mechanical engineers can reduce society's reliance on fossil fuels and significantly lower greenhouse gas emissions.
Engineers can also contribute to energy storage solutions, such as designing efficient battery systems that store energy from renewable sources for use during periods of low energy generation. This shift will help create a more sustainable and resilient energy grid.
Designing for Energy Efficiency: Mechanical engineers can play a crucial role in making industrial processes and products more energy-efficient. In manufacturing, for instance, engineers can develop energy-efficient machinery, optimize production lines to reduce energy consumption, and adopt automation systems that minimize resource waste. By designing products that consume less energy throughout their lifecycle, mechanical engineers can significantly reduce the carbon footprint of industries and consumers alike.
Energy-efficient building systems, such as advanced HVAC systems and smart heating and cooling technologies, can also help reduce energy consumption in residential and commercial settings, contributing to lower emissions and greater energy conservation.
Adopting Circular Economy Principles: Circular design, which emphasizes reusing, repairing, and recycling materials, offers a powerful solution to resource depletion and waste generation. Mechanical engineers can design products with modular components that are easy to repair or upgrade, extending the life of products and reducing the need for raw materials. By developing machinery and systems that prioritize recyclability and minimize waste, engineers can help create closed-loop manufacturing systems that reduce the environmental impact of industrial production.
For example, designing parts for disassembly ensures that materials can be recovered and reused at the end of a product's life, rather than being discarded. Implementing these principles can greatly reduce the environmental footprint of both products and manufacturing processes.
Sustainable Manufacturing and Green Technologies: Manufacturing is one of the most energy- and resource-intensive sectors, but it also offers numerous opportunities for sustainability. Mechanical engineers can drive the adoption of green manufacturing practices that reduce emissions, conserve water, and minimize waste. Techniques such as additive manufacturing (3D printing), which produces minimal waste by building products layer by layer, can significantly improve resource efficiency.
Engineers can also explore using sustainable materials, such as biodegradable plastics or recycled metals, in product design and manufacturing. The development of clean technologies, such as energy-efficient industrial equipment, further supports efforts to make manufacturing processes greener and less harmful to the environment.
Decarbonizing Transportation: Transportation is a major source of carbon emissions, and mechanical engineers are instrumental in developing sustainable alternatives. Engineers can continue to advance the development of electric vehicles (EVs), improve the efficiency of electric motors, and design lightweight vehicle components that reduce energy consumption. The transition from gasoline-powered vehicles to electric or hydrogen-powered transportation will significantly reduce carbon emissions.
Additionally, mechanical engineers can work on improving public transportation systems, making them more efficient and accessible, which can reduce the number of private vehicles on the road and lower overall emissions.
Improving Industrial Water Usage: Industrial processes consume vast amounts of water, and mechanical engineers can address this issue by developing more efficient water management systems. Technologies such as closed-loop cooling systems, water recycling, and advanced filtration can reduce water consumption in factories and power plants. By designing systems that conserve water and minimize pollution, engineers can help protect freshwater ecosystems and reduce the environmental impact of industrial activities.
To effectively address the sustainability crisis, mechanical engineers must adopt practices that focus on long-term environmental health and resource conservation. Key practices include:
- Lifecycle Assessments (LCA): Engineers must evaluate the environmental impact of their designs from cradle to grave, ensuring that products are sustainable throughout their lifecycle—from raw material extraction to disposal.
- Eco-Friendly Material Selection: Using sustainable, recyclable, and renewable materials helps minimize environmental damage and resource depletion.
- Energy Audits: Conducting energy audits for industrial systems and processes allows engineers to identify areas for improvement and implement energy-saving measures.
- Embracing Green Certifications: Engineers should aim to design and implement systems that meet green certification standards such as LEED (Leadership in Energy and Environmental Design), ensuring their projects meet high sustainability benchmarks.
- Cross-Disciplinary Collaboration: Mechanical engineers can collaborate with environmental scientists, urban planners, and architects to create holistic solutions that integrate sustainability into infrastructure, technology, and urban development.
Conclusion: Resolving the Crisis Through Sustainable Mechanical Engineering
The environmental crisis caused by past mechanical engineering innovations demands a new approach to engineering—one rooted in sustainability, ethical responsibility, and long-term thinking. Mechanical engineers have a unique opportunity to lead the way in addressing the pressing issues of climate change, resource depletion, and environmental degradation. By embracing renewable energy, energy-efficient design, sustainable manufacturing, and circular economy principles, mechanical engineers can create solutions that not only drive technological progress but also protect the planet.
Sustainable mechanical engineering is not just about designing better machines—it’s about ensuring that the systems we build today will support a healthy, thriving planet for generations to come. By prioritizing sustainability in their work, mechanical engineers can help resolve the environmental crisis, ensuring that industrial advancements no longer come at the cost of the Earth’s well-being.
